
TV BLOG

Adam & Lexie // 5.14.22 // Minerals Hotel, Vernon, NJ // Highlight Video.
Congrats Adam & Lexie!
We loved shooting their event at Minerals Hotel in Vernon, NJ
Such a wonderful couple with vibrant personalities that really made our job easy.
Congrats Adam & Lexie!
We loved shooting their wedding video at Minerals Hotel in Vernon, NJ
Such a wonderful couple with vibrant personalities that really made our job easy.

Their wedding video package:
II. Just the Highlights
Coverage Included
10 Hours of Video coverage.
One Primary Wedding Videographer
Edits Included:
2-3 minute wedding Highlight edit*
Wedding Videos are Full HD 1080p mp4 digital files

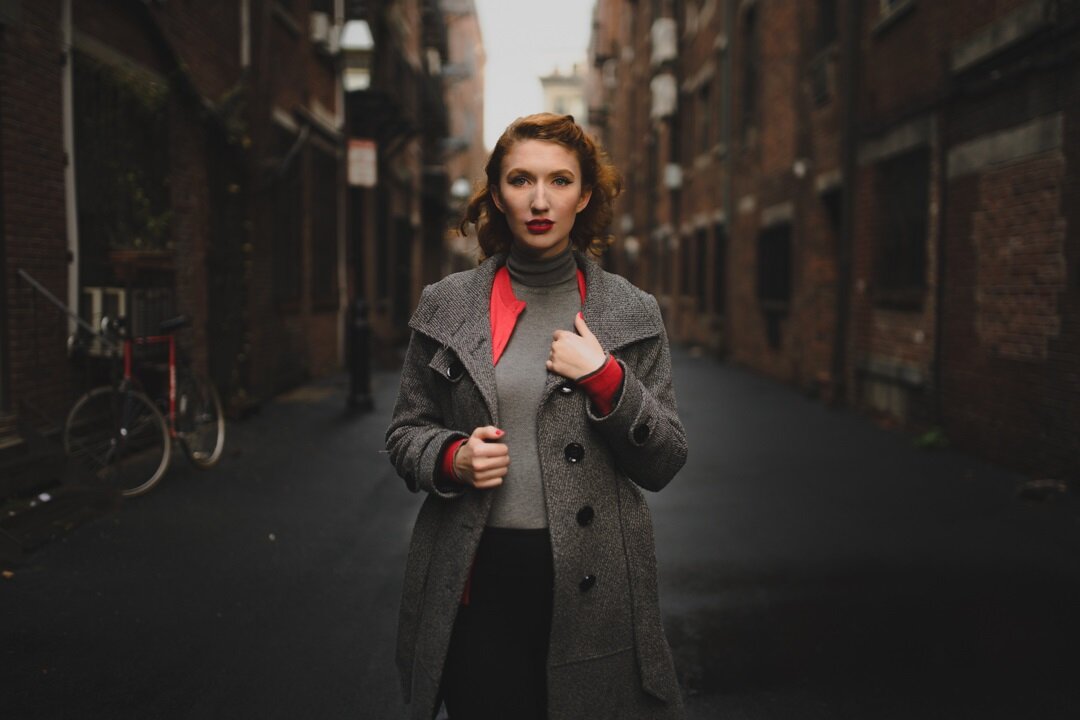
NJ wedding video still frame. NJ wedding videographer Timeline Visuals
looking for coverage similar to this wedding video?

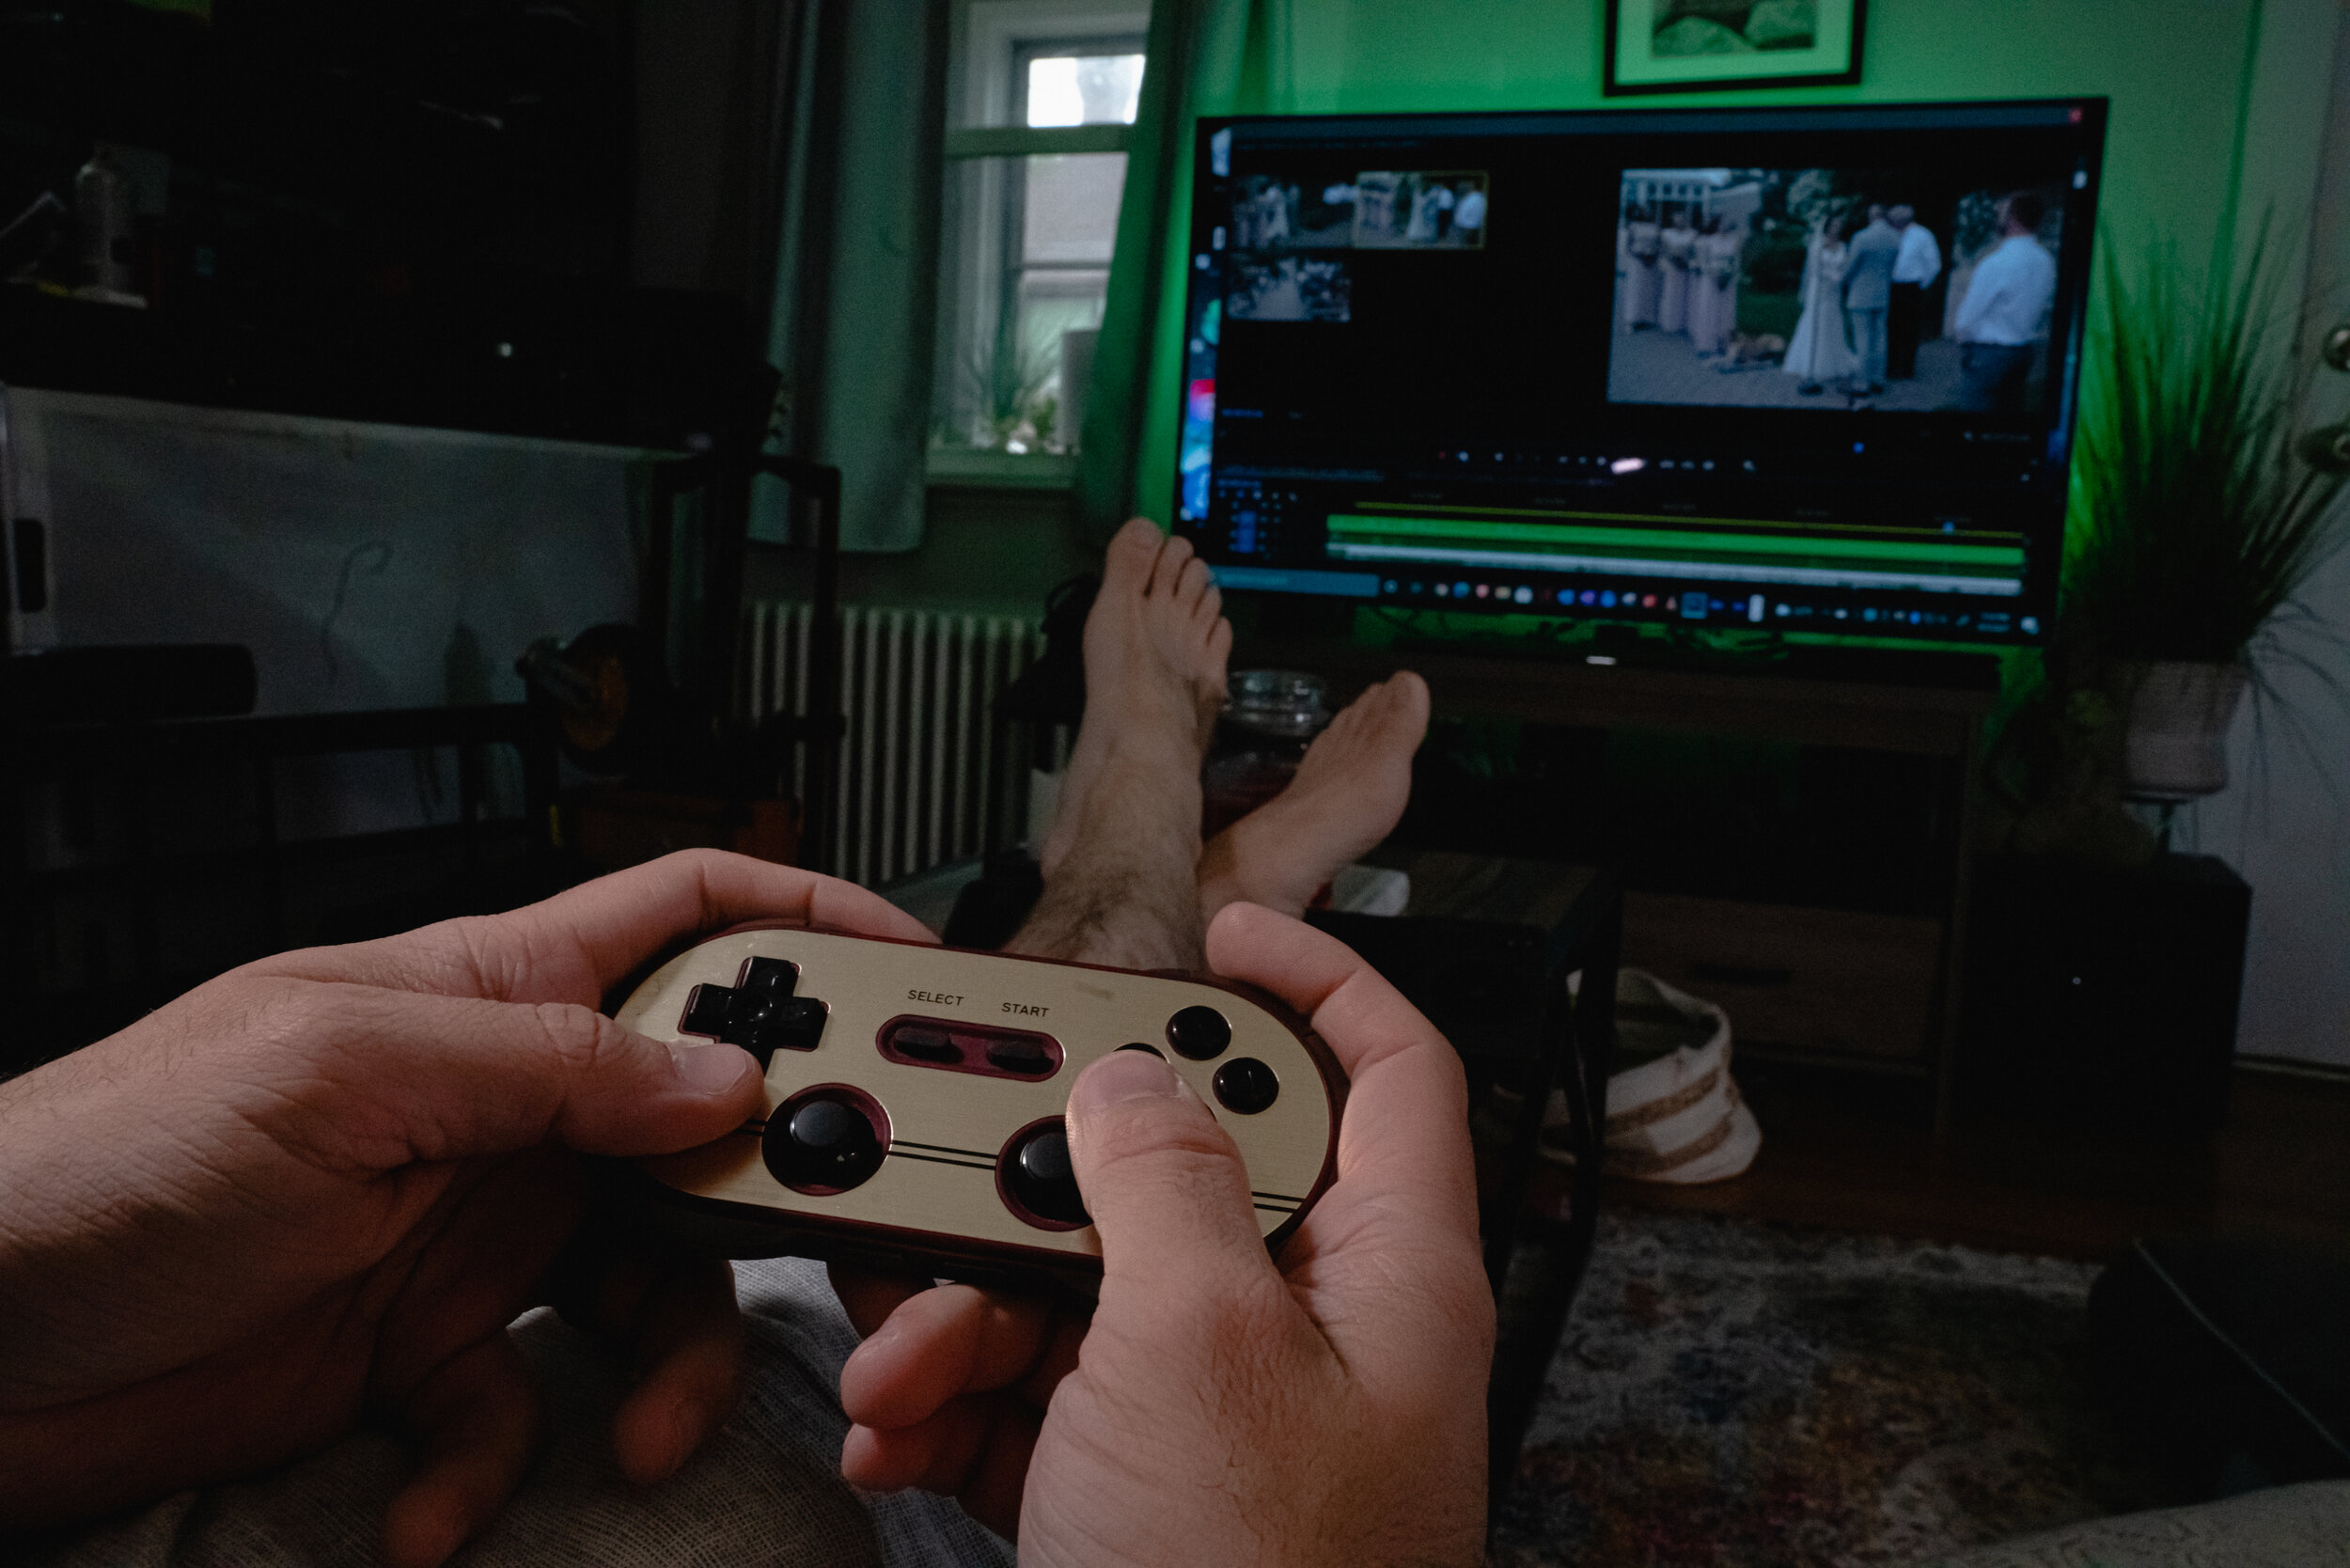
Using a Gamepad to Cull Photos in lightroom
If you are like me and absolutely loath the culling process. this might be something that appeals to you. I use a combination of this and a program called Aftershoot which uses AI to cull your photos for you. This is often my first step and then I go through and check for only my absolute favorites and neccisary photos.
If you are like me and absolutely loath the culling process. this might be something that appeals to you. I use a combination of this and a program called Aftershoot which uses AI to cull your photos for you. This is often my first step and then I go through and check for only my absolute favorites and neccisary photos. You can get 10% off aftershoot with this code.
With this guide youll be able to kick your feet up and relax by grabbing your favorite console controller and programing it to use keyboard shortcuts. This is a universal keybinding process and can be use it any program such as premier pro for multicam editing, davicni resolve, Photomechanic, capture one Aftershoot or honestly any program with a large amount of shortcuts, Forr this we will be explaining the shortcuts for lightroom.
If you are on a windows PC you are going to want to purchase Controller Companion it is $2.99 and well worth it.. You can purchase it using the steam store, this should be familiar to any PC gamers reading this. You can also purchase it directly from them here.
The idea is programing you gamepad to utalize shortcuts so you dont have to touch your mose or keyboard a full list of lightroom shortcuts can be found here.
So first thing you need to do after installing is open it. For whatever reason it opens directly to to the taskbar icons. you need to click the icon and open settings

Next navigate to profiles. I would reccomend creating a program binding if you plan on using more then one program.
Below is my lightroom Profile


the best part is you can use any controler you want. Some may even opt for a wireless keyboard like the Corsair K83
This page contains Amazon affiliate links. If you choose to purchase one of these products, we will be compensated and at no cost to you. This helps us to continue writing quality content for readers like you. Thank you for reading!

The filming of Nani Wells music video "Dark"
The production for Nani’s music video “Dark” was a blast to make. We shot it over the course of two days, with a relatively loose concept.

The production for Nani’s music video “Dark” was a blast to make. We shot it over the course of two days, with a relatively loose concept. We filmed it all on the Sony fs5, while recording Raw Cinema DNG to our Atomos Shogun Inferno. For most of the video we used our Movi m15, with an Easyrig Mini Max to save our arms. We also used the Proaim Camera Jib to get the some overhead shots in the bathtub.

While we originally planned for 3 locations, the Vernon Boardwalk footage didn’t end up making it into the final edit. But with how cold it was that day, Nani was obviously freezing and who could blame her. It was 7am on a brisk, mid January morning.
Joey shooting a scene with Nani on our Movi M15.
For the edit, I colored all of the raw clips in Davinci Resolve and then exported them separately. Then I had Joey cut it together in Premiere Pro, using proxies so that we could exchange project files, and after I would do the final export on my computer. Cinema DNG can be huge in file size, so we recommend WD Black Drives for their mix of large storage capacity and performance. A raid DAS or enclosure might be necessary to mount them externally. We recommend using QNAP TR-004, Synology 4 bay NAS DiskStation DS920+, or for enclosures without raid a Mediasonic HF7-SU31C.
This page contains Amazon affiliate links. If you choose to purchase one of these products, we will be compensated and at no cost to you. This helps us to continue writing quality content for readers like you. Thank you for reading!

Things we think we did great
We worked well on the fly without a defined plan
We were able to keep the production relatively minimal
Shooting raw on the Fs5 was really great, despite the extra storage requirements
Things we think we could improve
We needed more B-roll, we started running out of shots during the edit
Our schedules and budget were limited, but both would have benefited from a thorough plan
We probably could have traded some of the gimble shots for tripod shots, to minimize strain on our two-man crew
We would have benefited from having more crew members. Some lighting sacrifices were made, due to limited mental bandwidth
More BTS from the video


Shutter Speed, Whats that?
What is Shutter Speed?
I just took your photo, wanna see me do it again? Wanna see me do it in slow-motion?

Photographer : Danny Graham -Engagement session at Raymond skills falls in PA, using a faster shutter speed to preserve a frozen moment.

Photographer : Danny Graham - Using flash and a relatively fast shutter to preserve the bride’s cousin’s dance moves, at her wedding at Casa Bianca in New Jersey.
The camera’s shutter is a mechanical (sometimes digital) device, that opens and closes for a predetermined amount of time. (There is also an open shutter for long exposure shots.)
Shutter is measured in parts of a second. Examples are 1/10,1/15, 1/30,1/60, 1/120, 1/240, but also in full seconds 1s , 5s ,10s.

Photographer Danny Graham, captures spark using a fast shutter during bride and grooms first dance at Casa Bianca in New Jersey.
The amount of time that the shutter is open or that the sensor is accepting light, determines the exposure of the image. It also determines how much motion blur the image gets or doesn't get.
Photographer : Danny Graham - Model Seana, stands in front of a moving train. Here we’re using a slow enough shutter to capture the motion of the train, but it’s still fast enough to preserve the model’s details.
Before you go cranking your shutter up to 1/8000, keep in mind that there are times when the motion blur from a slower shutter can be desirable. You can show a fast moving object, with a still world to emphasize the contrast of energy.

Photographer : Danny Graham - Entrance sparklers captured with some motion blur.
A fast moving subject can be followed as it passes, producing a clear crisp subject and it can emphasize the motion in a single image. Or you can always use a flash to preserve your subject and blur the background, using a process called Shutter Drag. Common examples are often used in motorcycle photography.

Photographer : Danny Graham - Capturing friends and motion blur on the dance floor. Wedding/Event @ Casa Bianca in Oak Ridge, NJ

Photographer : Danny Graham - Using shutter drag with a flash and a slower shutter speed. Wedding/Event @ Casa Bianca in Oak Ridge, NJ.
Contrast to using motion blur, you can always crank up the shutter and freeze motion. This can be awesome when capturing moments that are typically too quick to appreciate all of the fine details. Like someone or something frozen in mid air, or the spray of water, dirt or dust.
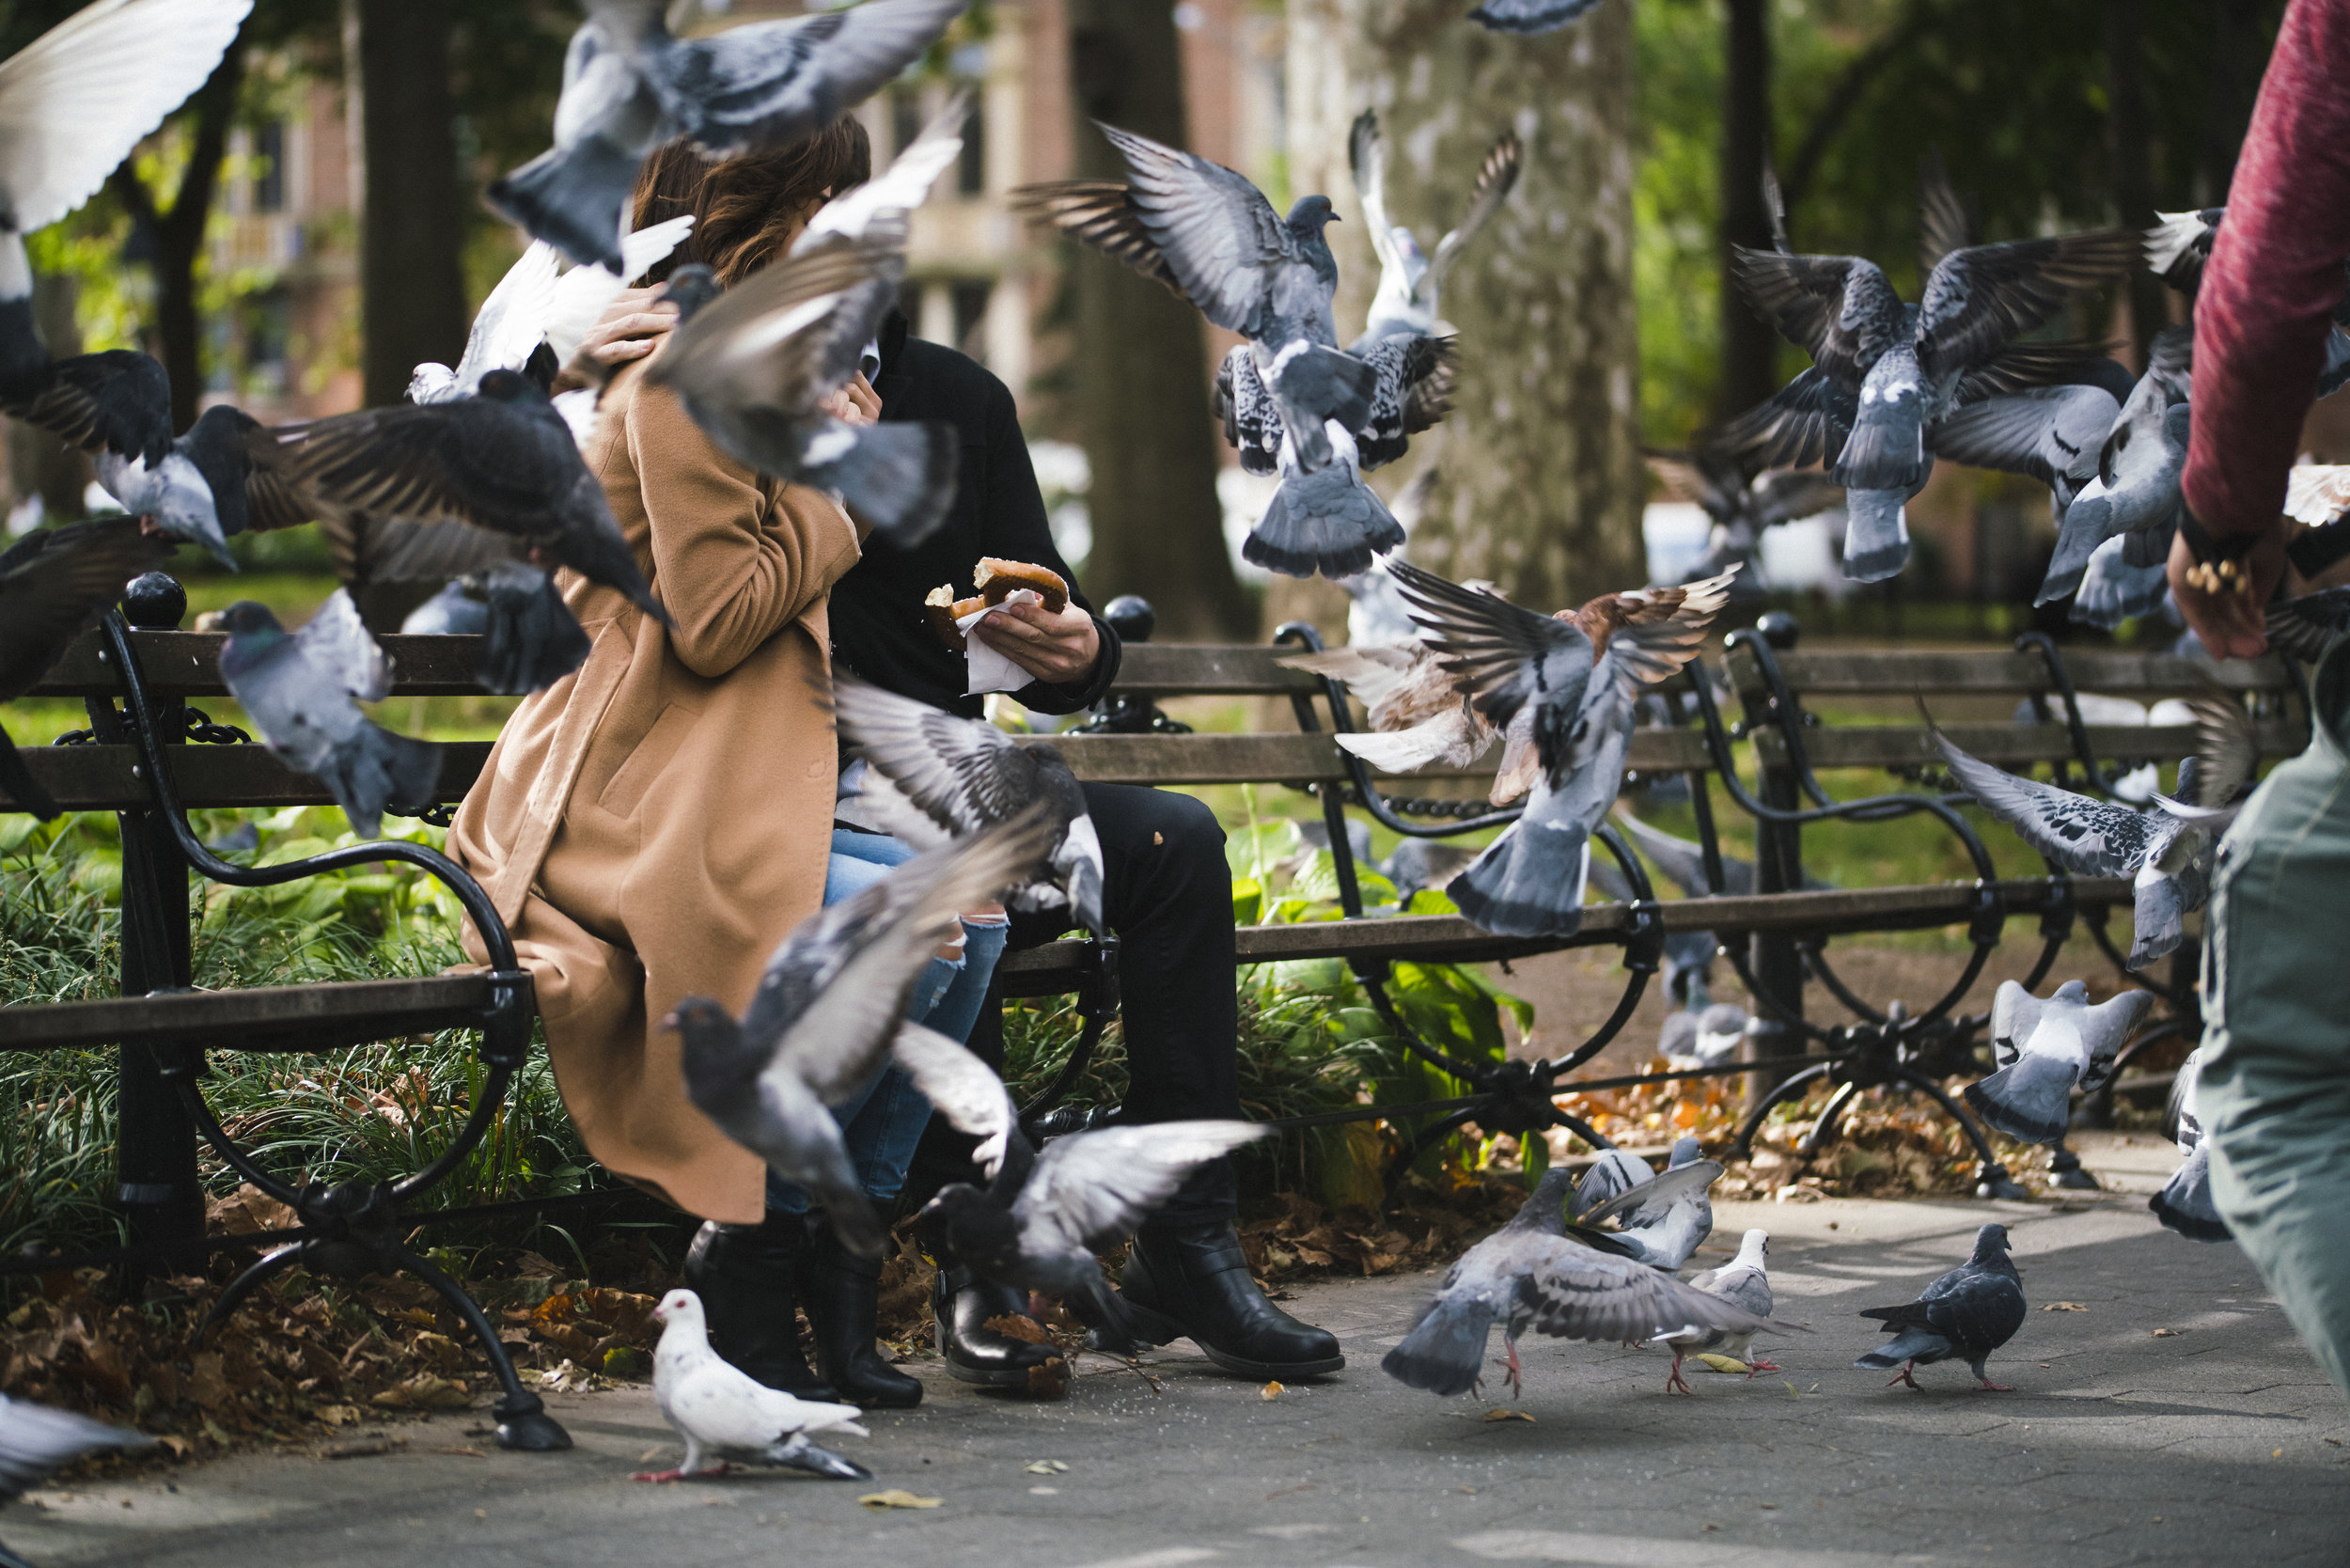
Photographer : Danny Graham - Shooting pigeons in a NYC park. The birds are frozen in time, using a faster shutter speed.
For video : Typically, you double or divide your shutter in half, in order to move up and down full stops of light. For video, it's often advised to follow the 180 rule. This is the perceived cinematic “normal”, in which you are doubling the frame rate to identify the shutter. Using the 180 rule, if you shoot in 24p as a frame rate, than your shutter should be set to 1/48 or 1/50. This is not so much a rule, but more of a guide. I encourage you to experiment with different frame rates and faster shutters, to produce crisper motion with less motion blur.

Photographer : Danny Graham - Captures a drummer playing mid-beat.

Photographer : Danny Graham - Capturing some entrance sparklers, while balancing the exposure and also timing the moment for the Bride and Grooms exit at Crystal Springs Ballyowen Golf Club in Hamburg, NJ.
Hopefully this helps you to better understand shutter speed and how it works. It’s used as a lot more than just a way to control the exposure, so I hope that this knowledge can help your photography grow. Thank you for reading!
Visit our photography portfolio, or follow us on social media!